
In today’s era, data is an extremely valuable asset to organizations for overall success and as more data is generated with increasing size and volume, it is becoming difficult to organize and manage. To that end, various cloud providers offer easy & efficient means of collecting and sorting data. This article shows how you can retrieve files from an Azure Storage account and add their data to an Azure SQL Database using Python.
Pre-requisites
Before we can setup our code, we must first make sure that we have a Microsoft Azure Account, have the latest version of Python installed and have the necessary drivers installed. Then we must choose our Storage account & SQL Database. If you have not created them, doing so is relatively simple. Choose the object you want to make, select/create a resource group in your subscription, give the object a name and customize it according to your subscription plan. Once you have a storage account, you must upload a file into it so that we may read it. Uploading a file can be done via Python but for convenience sake, simply upload a file from the azure portal. The file we will be uploading in this example will be a text file with the following content:

Now we must download ODBC Driver 17 for SQL Servers which we can get from Microsoft’s official >documentation. Finally we must create a directory for to place our Python code file.
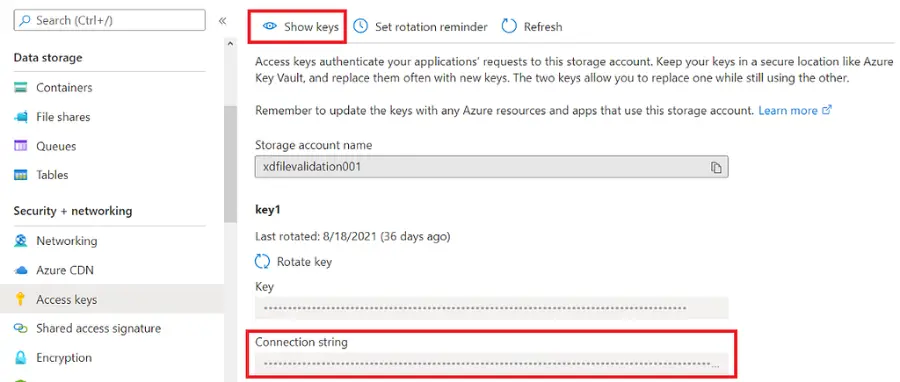
Now we must set an environment variable on our machine running the code to access our Azure Storage account. Go to the Storage account and in the Security + Networking should be a section called Access Keys. Press the show keys button to view and copy your connection string. Now open the command prompt and enter the following:
”setx AZURE_STORAGE_CONNECTION_STRING “<yourconnectionstring>””
Once we have all of these, we can begin with our coding.
Code
First we must import the following libraries which we will utilize to make the code work smoothly:
- Pyodbc
- Pandas
- OS
- Azure.Storage.Blob from which we will import BlobStorageClient
- Fast_to_Sql
Once the imports are ready, we must establish a connection with the SQL Database which we will do using the pyodbc library by giving it the necessary information. We setup a try block which will give an exception in case we get an error. Our code should look like so:
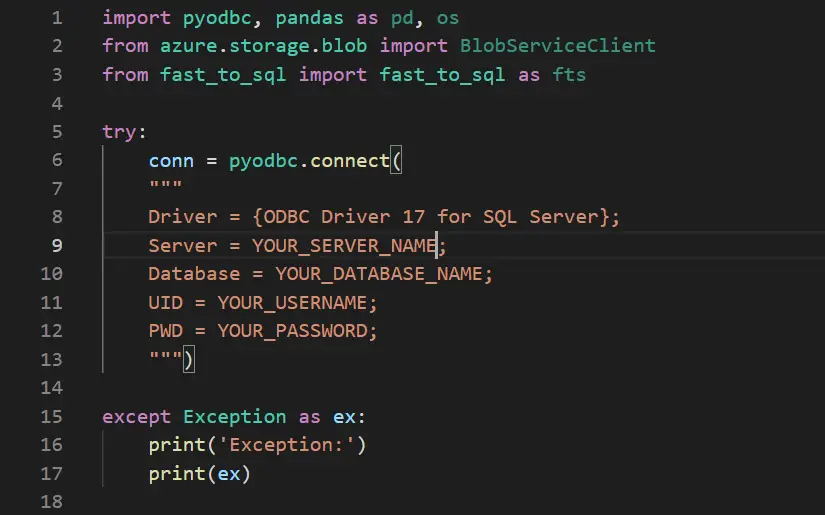
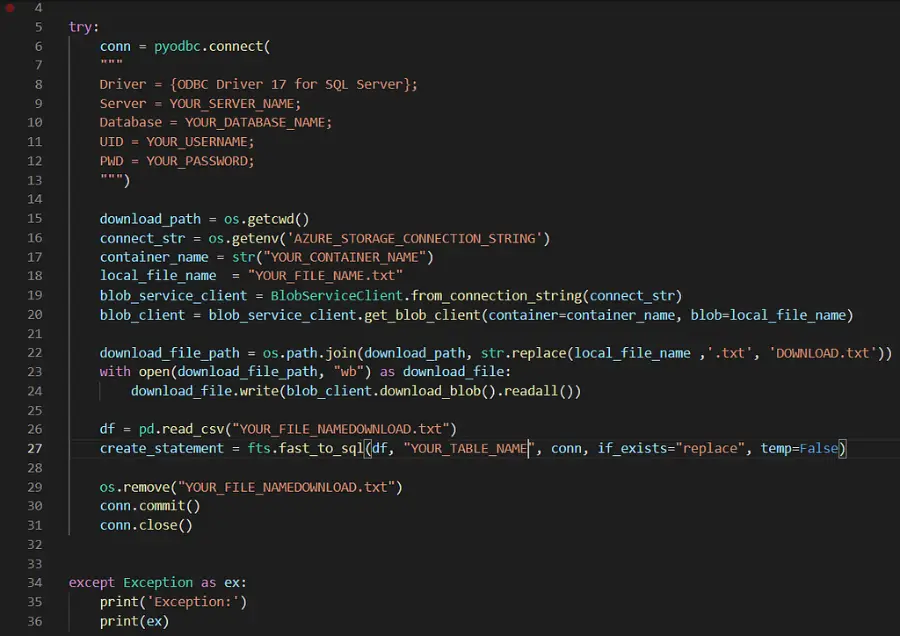
Next, we will use the OS library to set our current working directory as a download path for the file in the storage account. The file will be downloaded as a temporary file and deleted once we are finished with it. Then, using the same library, we get our connection string and set the container name and file in use. Next we will create the blob service client by giving it the connection string and create blob client which will be given the above parameters to download the file.
We then set our specified download path and set it such that the file will retain its original name but have a “DOWNLOAD” at the end. We then download the file using the blob client and convert it into a pandas data frame. Finally using Fast_to_Sql, we send a command to the database which creates a table with a name of our choice. If a table with the same name already exists, it will be replaced. The file is then deleted using the OS library, the changes in the database are committed and the connection is closed. The code should like as below:
Once we view our SQL Database, we will see our newly created table and the information from our example text file, neatly sorted into columns.
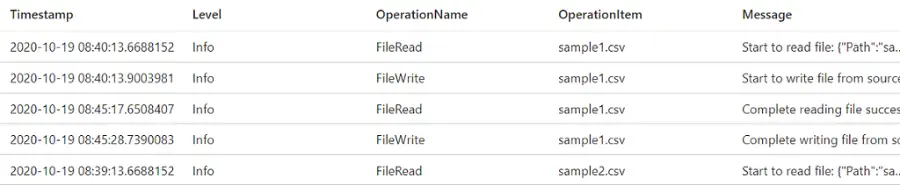
Congratulations! We have successfully uploaded the contents of our file in the Storage Account to our SQL Database!